Chinese Fonts
编辑字体软件 Font Editing Software
Click on any word to see more details.
Going further than just creating graphic images you may have is to actually want to edit or create your own text font. This is a large and more specialized undertaking. Fonts, especially Chinese fonts, include a large range of characters. However, it is the most reusable way to create fonts since, having done this, other people will be able to use your font in text and graphics editors. For this goal you will need a font creation package. Examples of font creation packages are the open source project FontForge and the market leading commercial package FontLab [FontLab]. If you choose FontLab you will need the AsiaFont Studio to edit and create Chinese fonts, which is $1,999 at the time of writing. I will take about FontForge in more detail.
FontForge
FontForge is an open source outline font editor. It competes with commercial software like FontLab. It can create fonts in many different formats, including opentype, truetype, and postscript. You can import glyphs that you have created in Inkscape with FontForge or you can create them directly in FontForge. The Freetype rasterization library for fonts is used extensively in FontForge. The narrative here relates to the 17:32 version 14 September 2009. Change the encoding to Unicode Full with the Encoding | Reencode menu.
Installing FontForge on Windows can be a challenge since Cygwin with X Windows and some graphics libraries is a prerequisite. If that does not work you might try a Linux virtual machine, such as andLinux. To start FontForge on Windows, start up a Cygwin command line and type
> startxwin
This will start X and bring up an X terminal. In that terminal type
> twm &
> fontforge -new
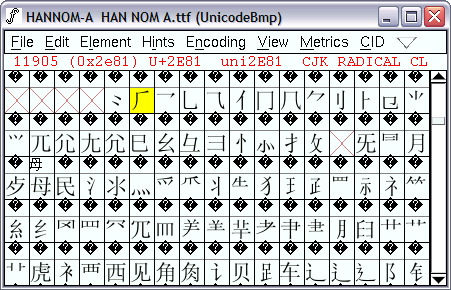
With any luck you will see the FontForge application window, as shown below. Create a directory somewhere under your Cygwin home directory for the fonts that you want to edit. Try copying a font from somewhere else and open it with File | Open. An example is shown below for the HanNom font HanNom [Le Van Dang 2005].
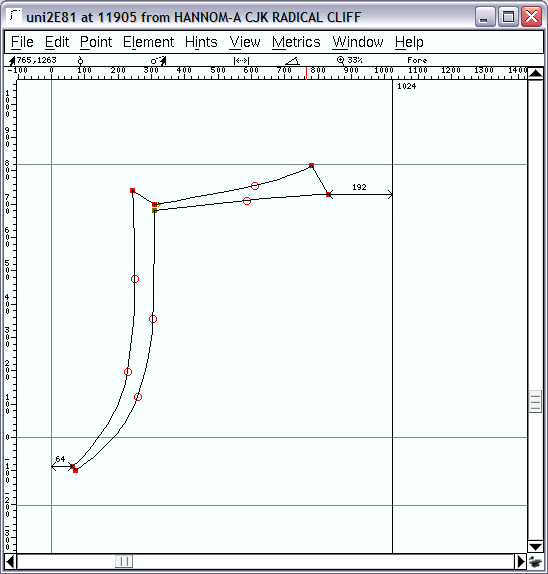
Double click on the character to bring up the outline glyph view. An example is shown below for the guang radical 厂。
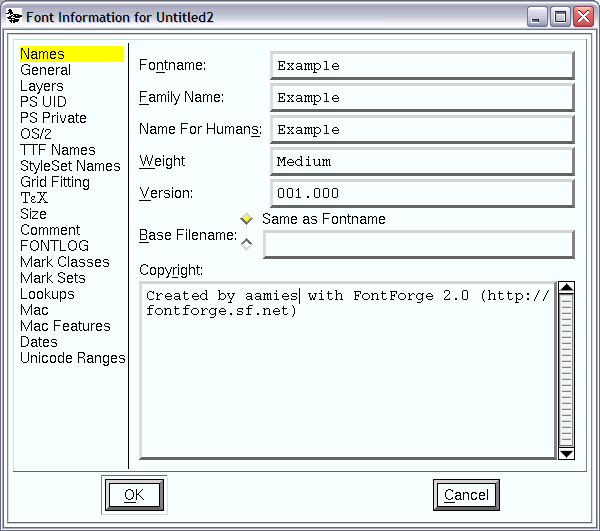
To create a new font start FontForge with the -new option or use the File | New menu. Enter information about the font with the Font Information dialog available from the Elements | Font Info ... menu, as shown below.
Enter a name for the font, such as 'Yan', and close the dialog. Reencode the font using the menu item Encoding | Reencode and select ISO 10646-1 (Unicdoe, Full). This will enable you to scroll down to the Unicode range for double-clicking the right glyph. Let's try out creating a glyph using an SVG import from Inkscape for the character qi 七. Save the file 4e03.svg on your local file system (under your cygwin home directory if you are using Windows). It has been created with a size of 1000x1000 pixels to be appropriate for FontForge. Double click the the glyph for 4E03 to open the Outline Glyph View dialog. Open the import menu from File | Import and select the file that you just downloaded. You should see the dialog below.
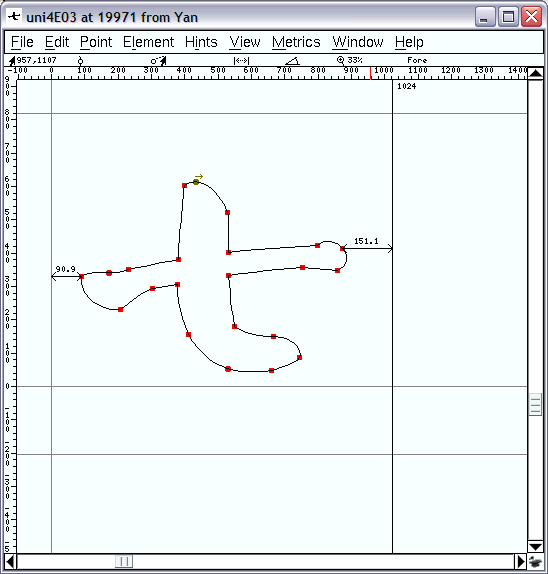
You may want to move the character around to position it in the place you want. To do that us the command Edit | Select | Select All (CTRL-A) and drag the character around to the desired position. Close the glyph dialog. Save the font. To experiment with FontForge at a slightly larger scale download the sample of Yan glyph files download/yan_sample.zip, which contains SVG and PNG files for about 80 glyphs. Navigation to the glyphs is faster using the menu item View | Go To. Enter the name of the glyph starting with 'uni', for example, 'uni4E94'. Repeat the process with the other 250 glyphs. You can validate the font with the command Element | Validation | Validate.
Let's generate the font to try it out. In the Font Information | General tab set the font size to 1024. Generate the font with the command File | Generate Fonts ..., select True Type font and call the font yan.ttf
Outer boundaries should be drawn in a clockwise direction and inner boundaries should be drawn in a counter-clockwise direction. Intersecting paths create problems. These problems need to be corrected. If it works ok, generate the font and install it on your system. Open Inkscape and select the font tool or on Windows open charmap. Change the font to yan. The result should look like the screen shot below.
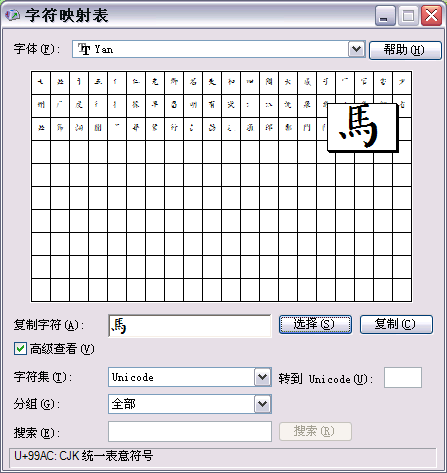
The FontForge project can be downloaded here: Yan.sfd. The font can be downloaded here: yan.ttf. This version is not complete and has some problems.
See the FontForge web site [FontForge] for more about FontForge.
Dictionary cache status: not loaded